How to connect, link or integrate Oruxmaps with Sicami or Strava to automatically transfer or export tracks and routes. Step-by-step guide with screenshots.

This procedure will affect every recorded route, but not the already existing ones, which have to be transferred manually. This last manual method will be explained further at the end of this article.
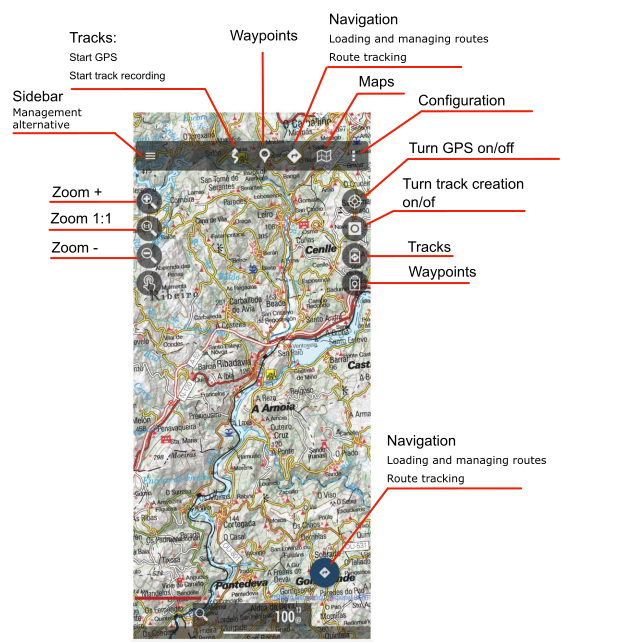
Scheme of the main screen of Oruxmaps with the most remarkable elements.
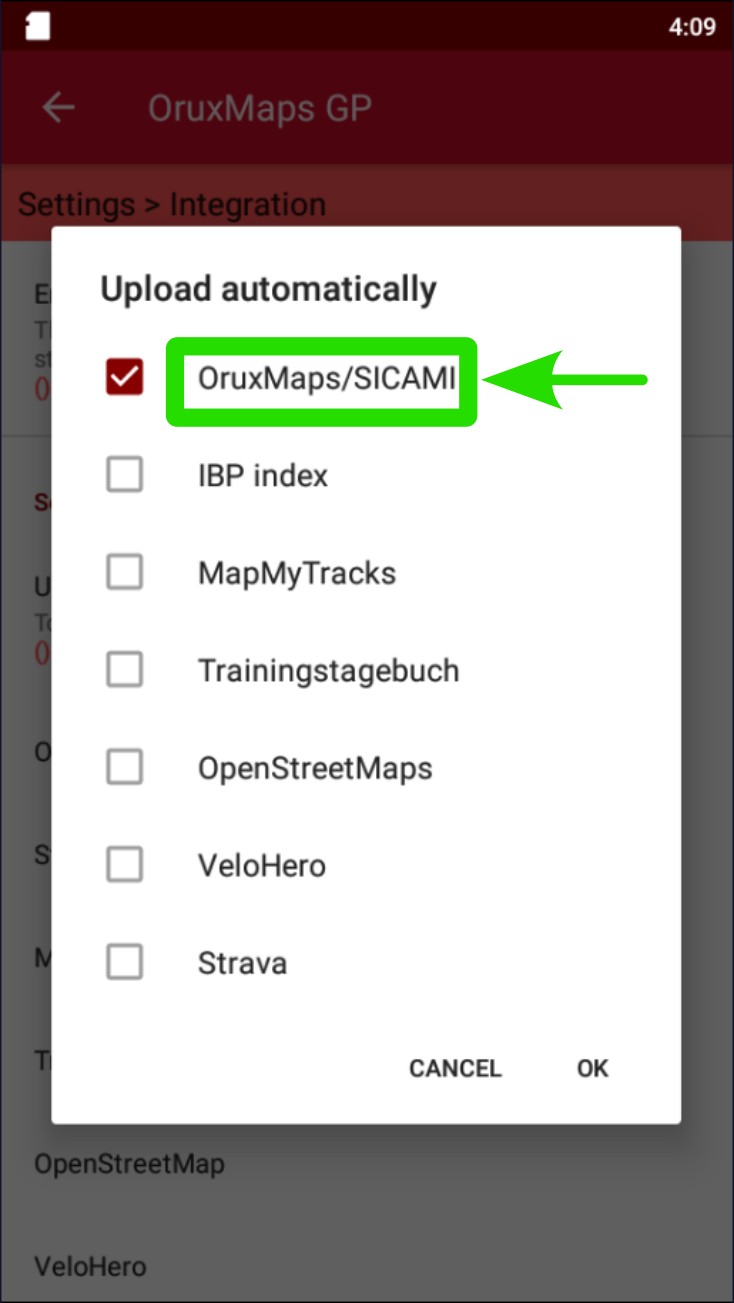
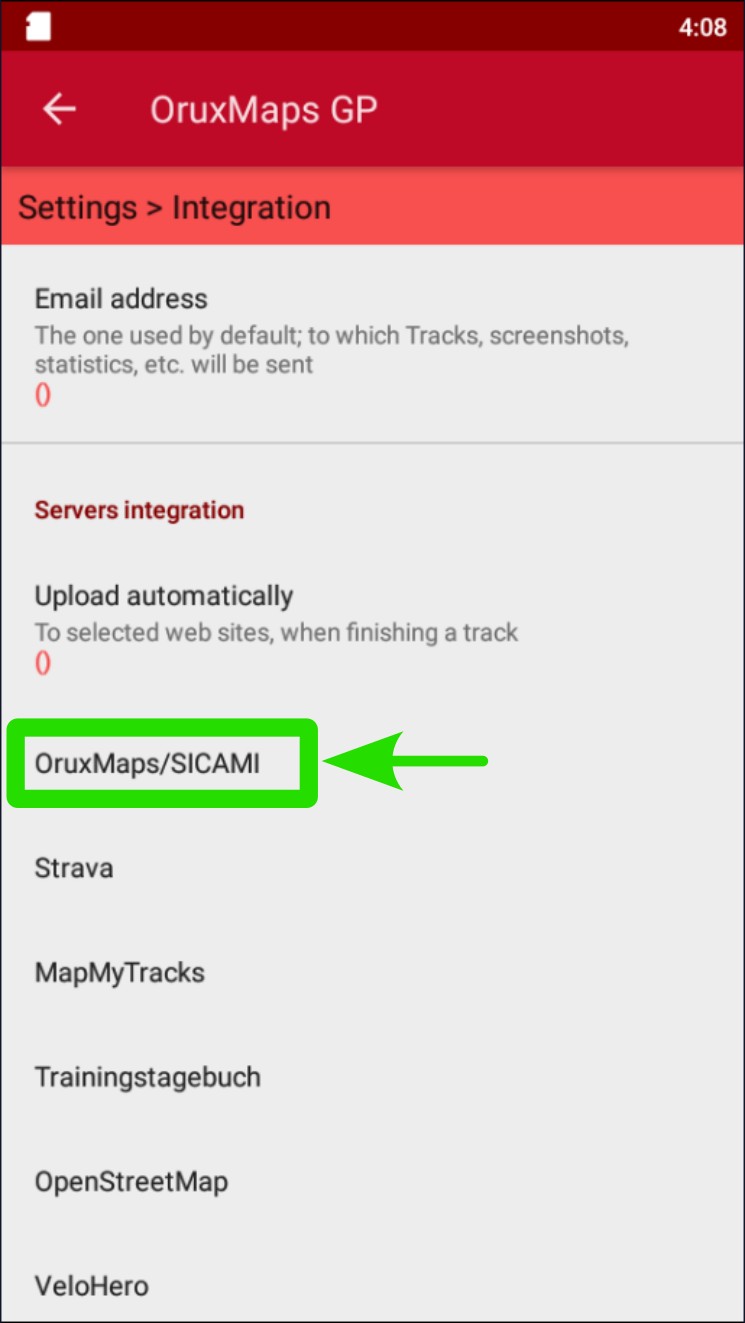
Go to Settings → Integration → Upload automatically → Check box Oruxmaps/SICAMI
It’s indispensable to have the corresponding accounts, otherwise either the information will be requested or it will be indicated so through a message.
The step-by-step procedure would be as it follows:
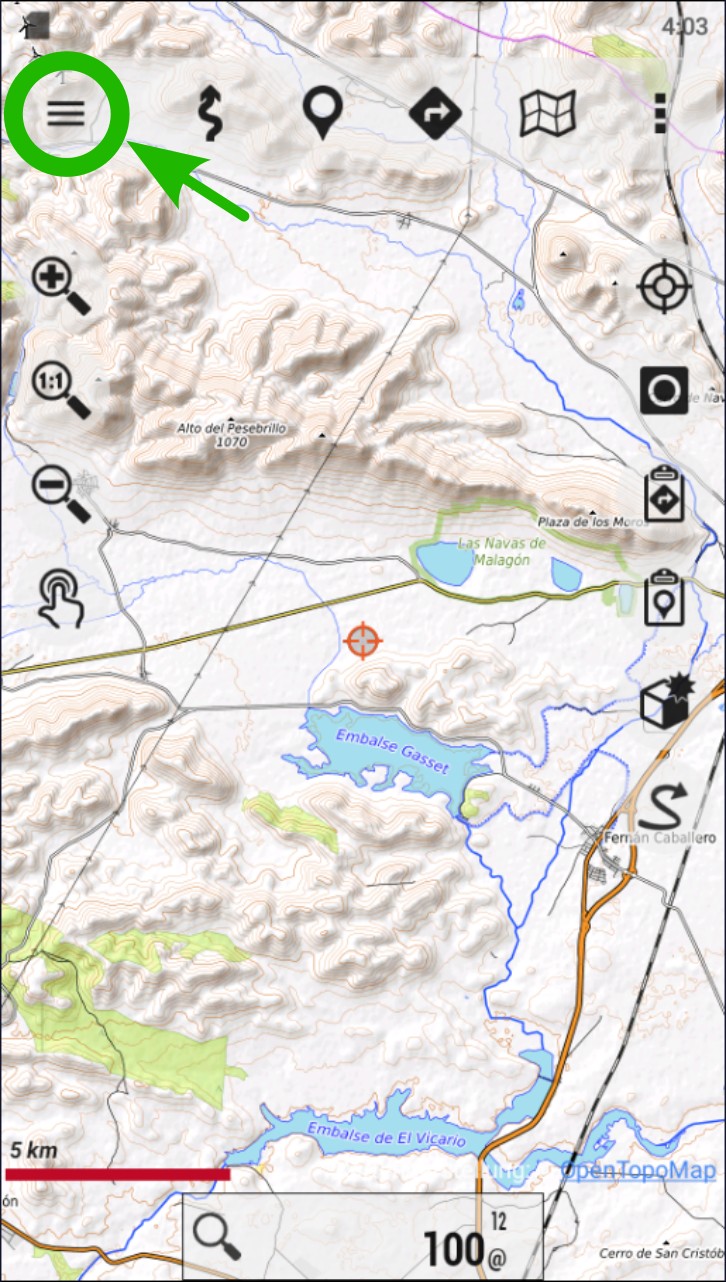
Tap on the “Sidebar” icon (three horizontal lines at the top left corner of the screen). This option is also accessible from “Configure the app” (icon with three dots at the top right corner of the screen.)
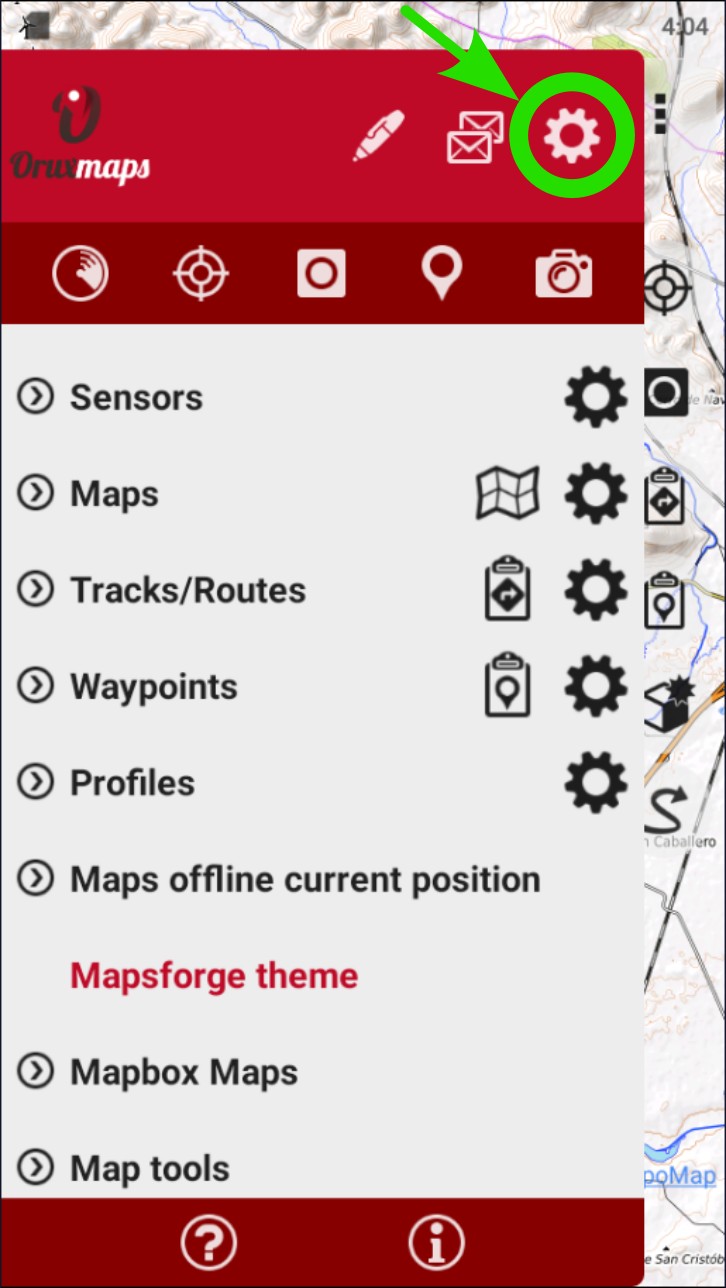
Go to “Global settings” tapping on the gear icon.
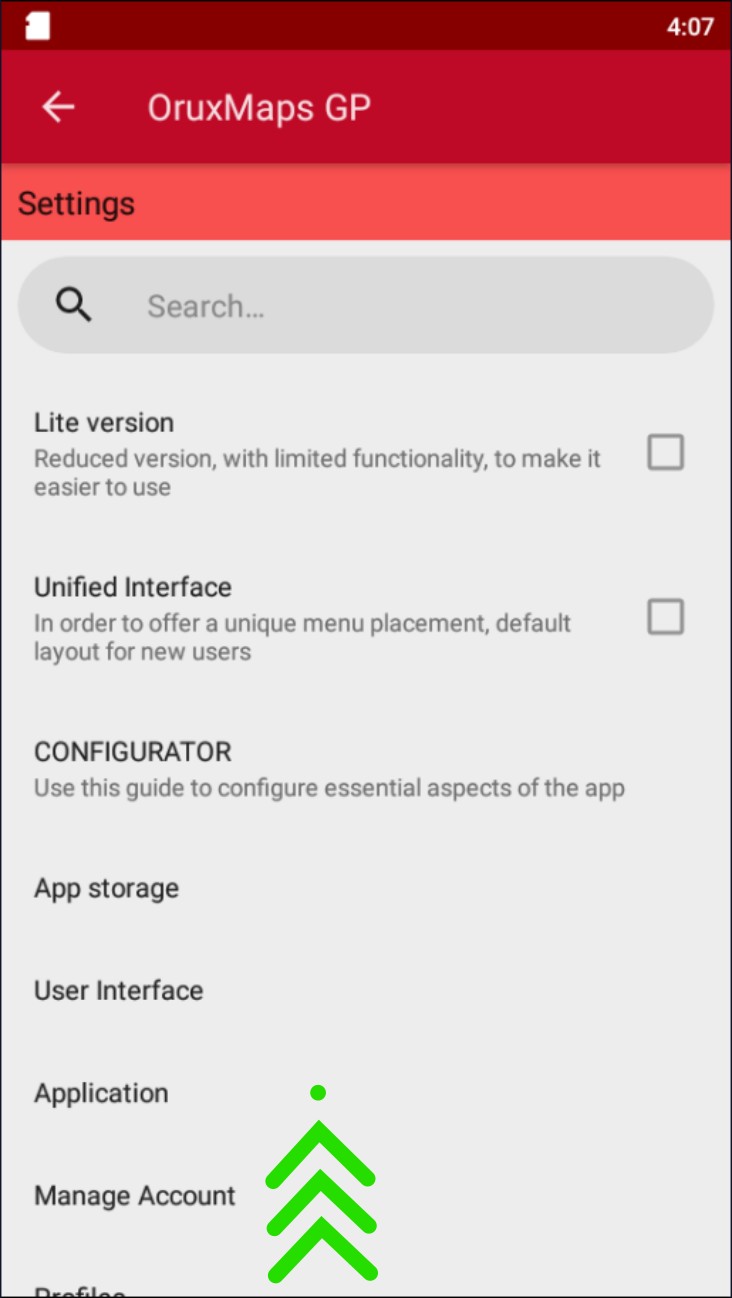
Scroll down until you find ‘Integration’. Whether all the options are visible or not will depend on the screen resolution of the phone.
Tap on "Integration".
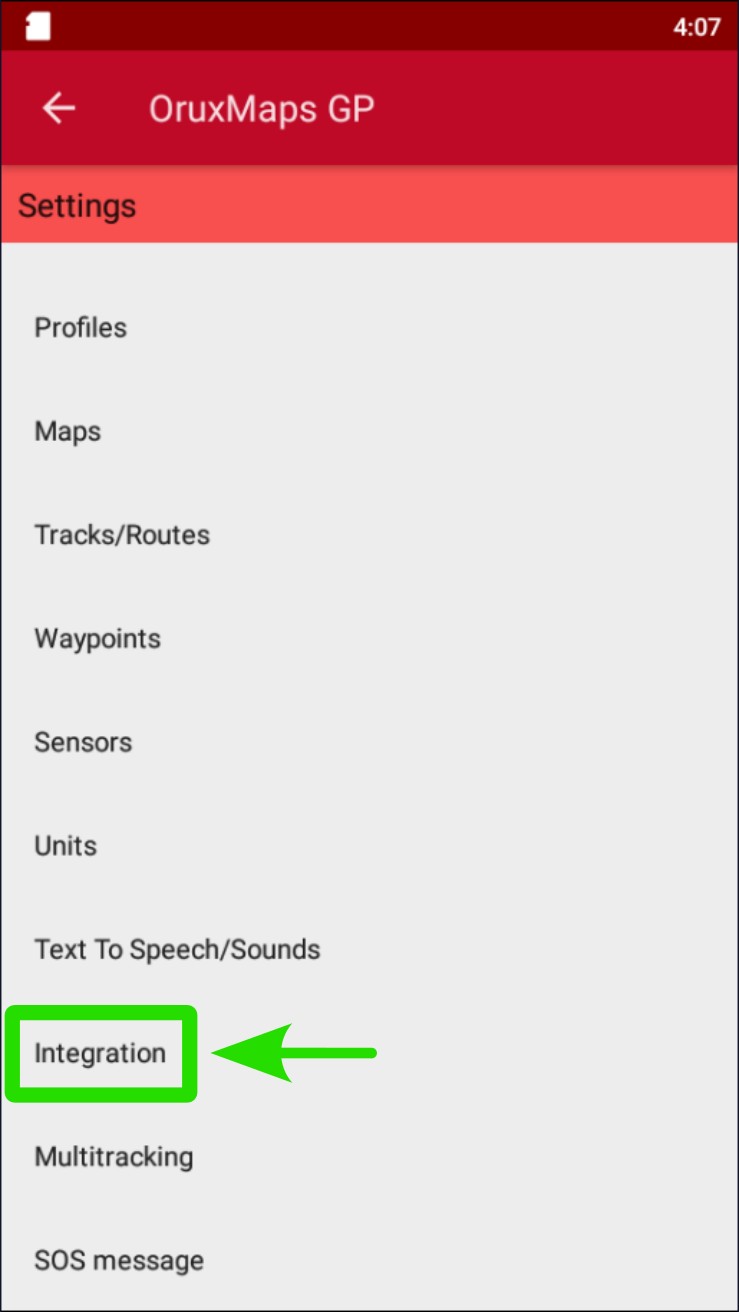
Tap on "Upload automatically".
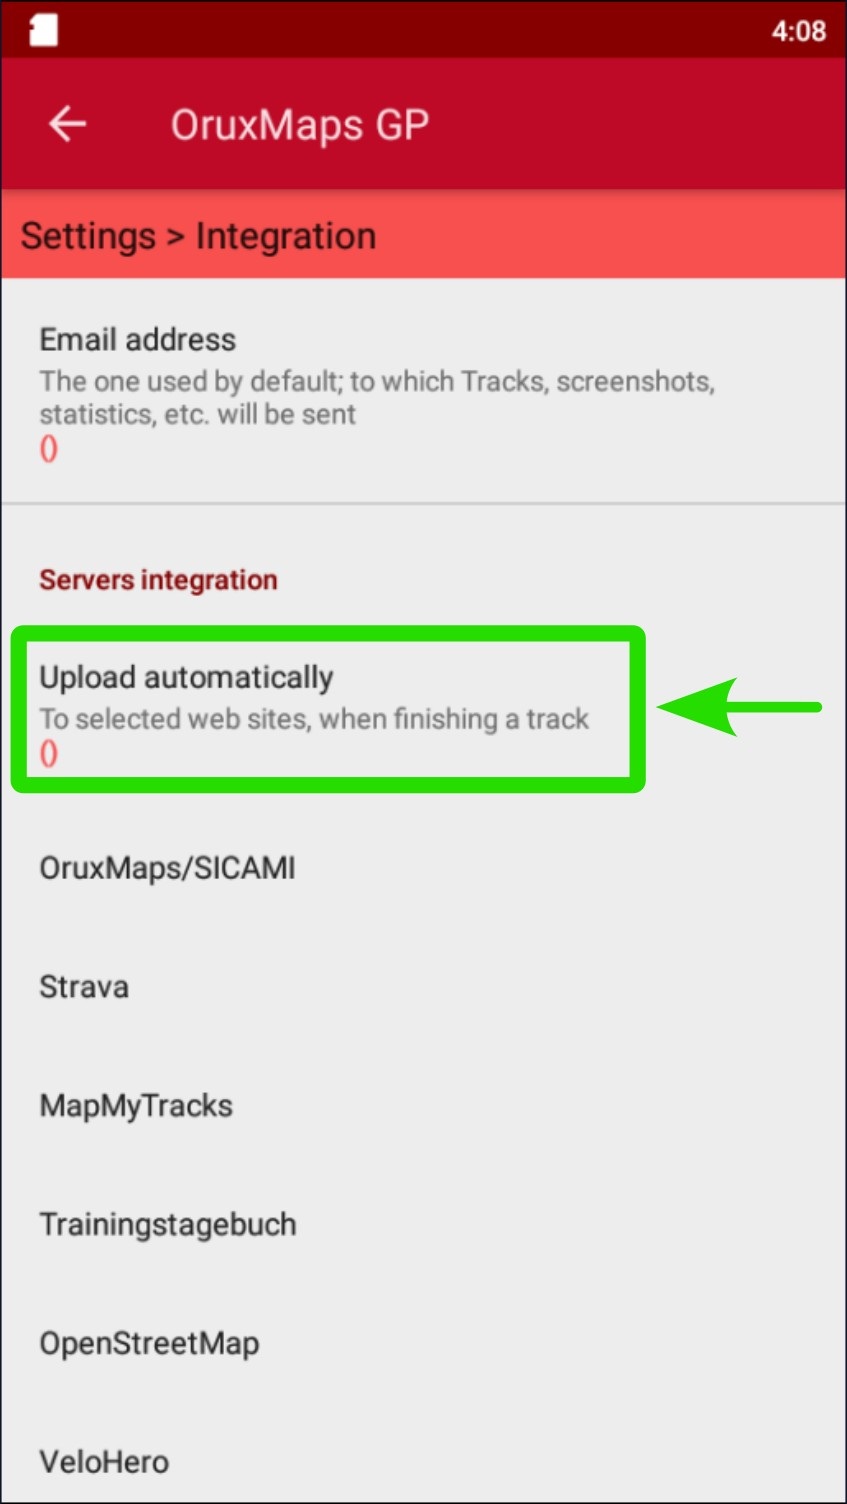
Check the corresponding box for the app you want to link.
In case the account isn’t configured, the corresponding information for the account on SICAMI will be requested. For Strava, you will need to log in through the pop-up window.
Configure the privacy of automatically-uploaded routes and whether you want the related pictures to be uploaded along them.
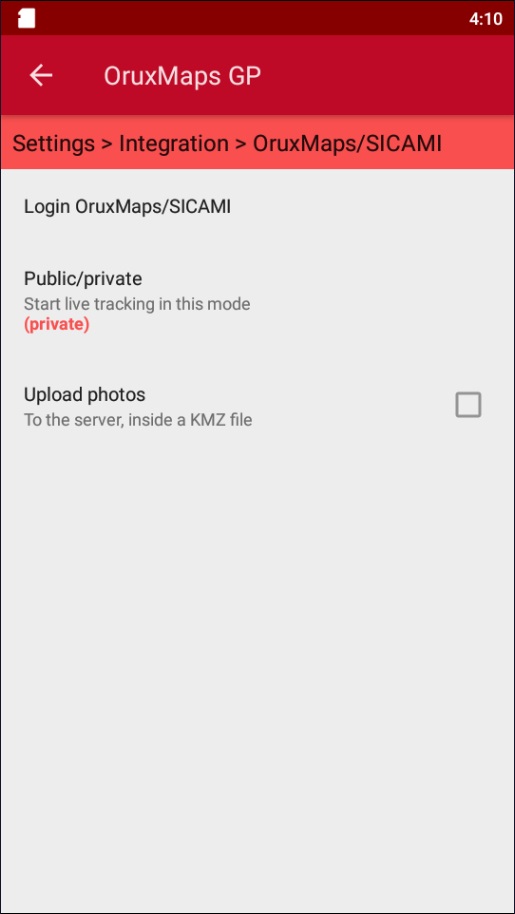
These settings can be configured later by accessing ‘Integration’ and selecting the linked app.
Manually upload routes to Sicami or Strava
Routes can also be transferred or uploaded to Sicami or Strava.
In order to do so, you will need to follow these steps:
- Access the Tracks/Routes list.
- Tap in the one you want to transfer.
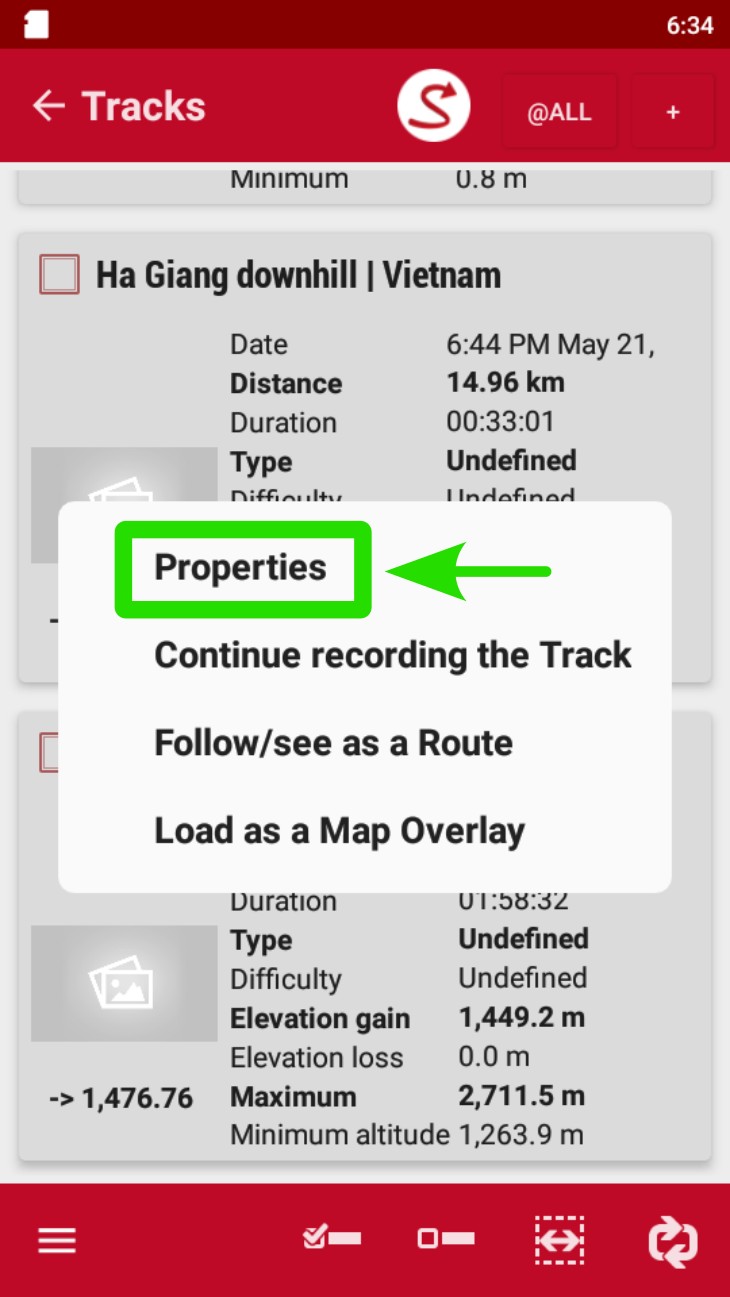
- Tap on “Properties” on the pop-up window.
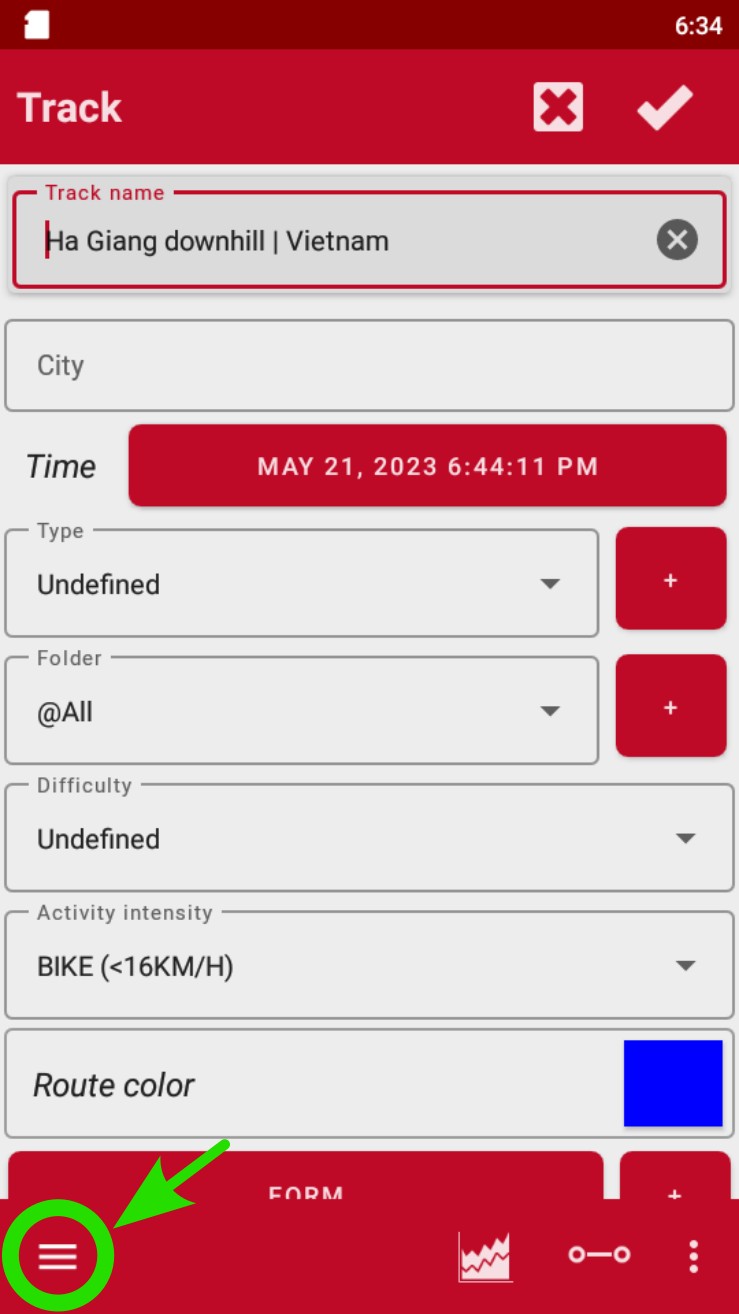
- Tap on the Configuration panel (three horizontal lines) at the bottom left corner of the screen.
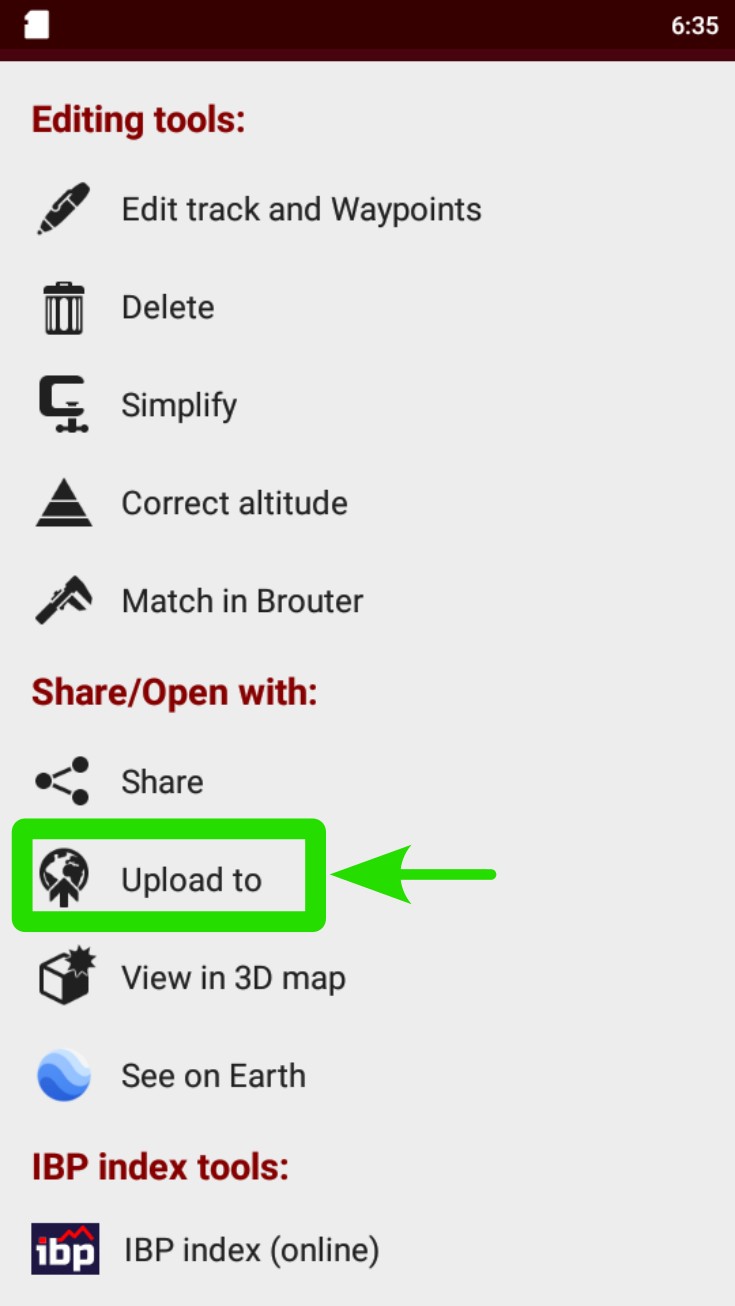
- Select "Upload to".
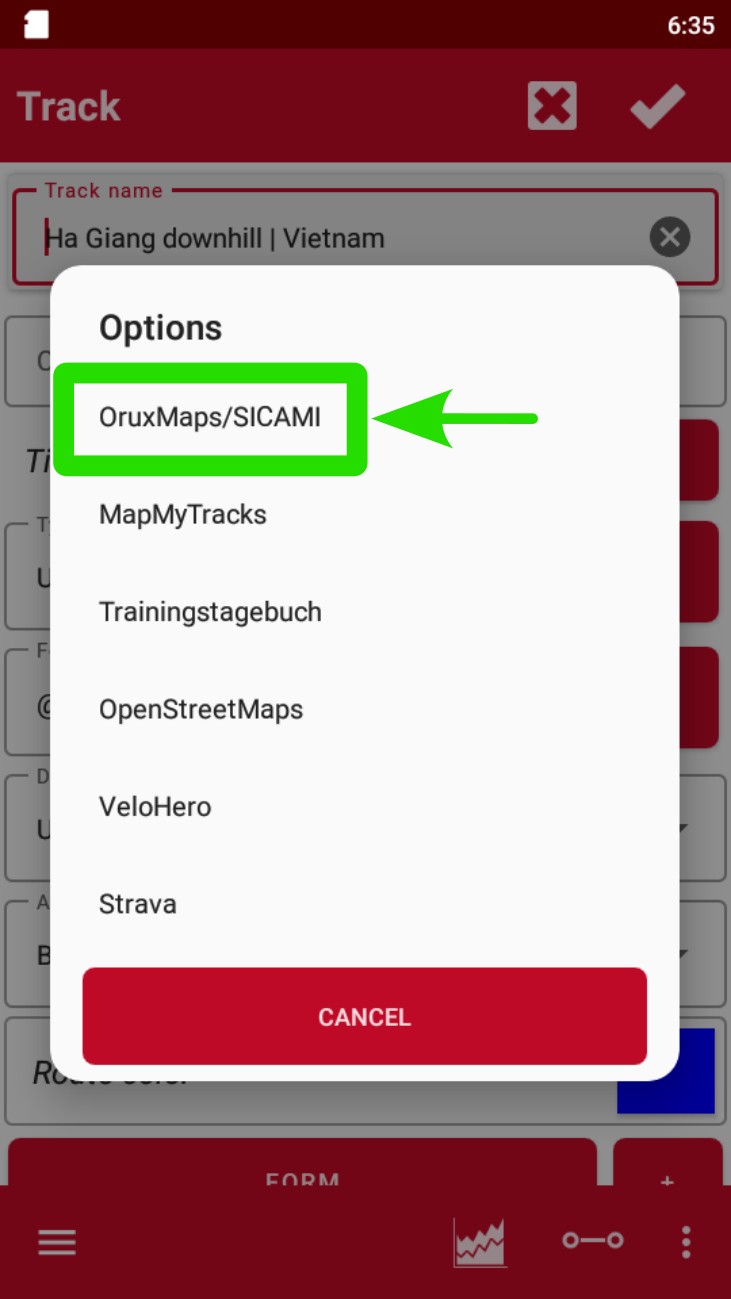
- Check "SICAMI" or Strava.
Next, the following steps are shown in a video and various screenshots.
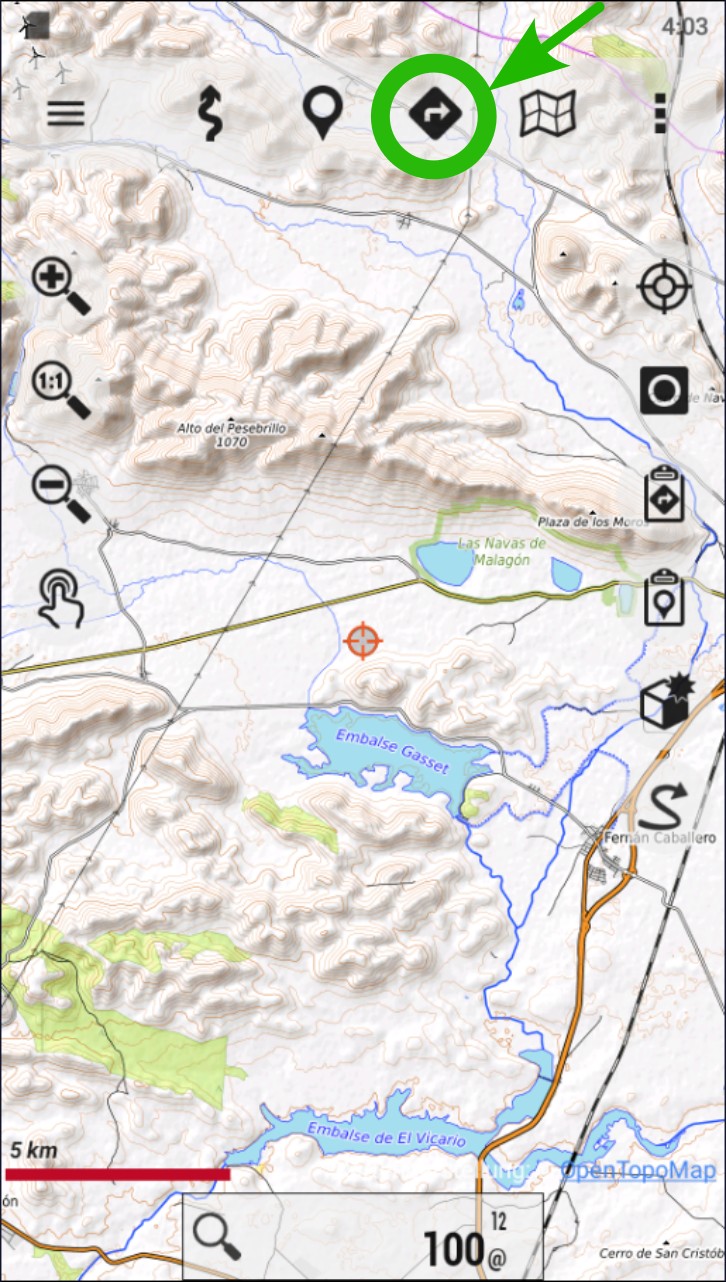
Tap on the NAVIGATION icon. It is also accessible through the “Tracks” button on the right side buttons.
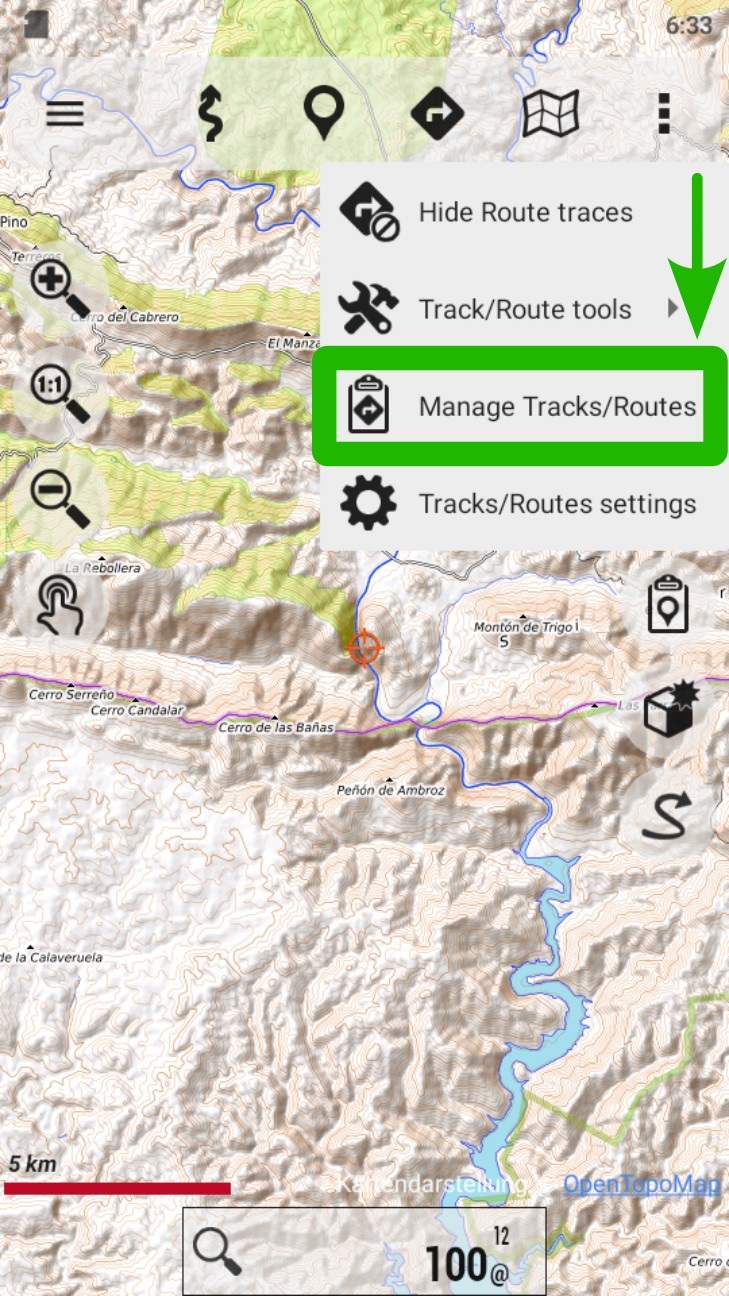
Go to “Manage Tracks/Routes”.
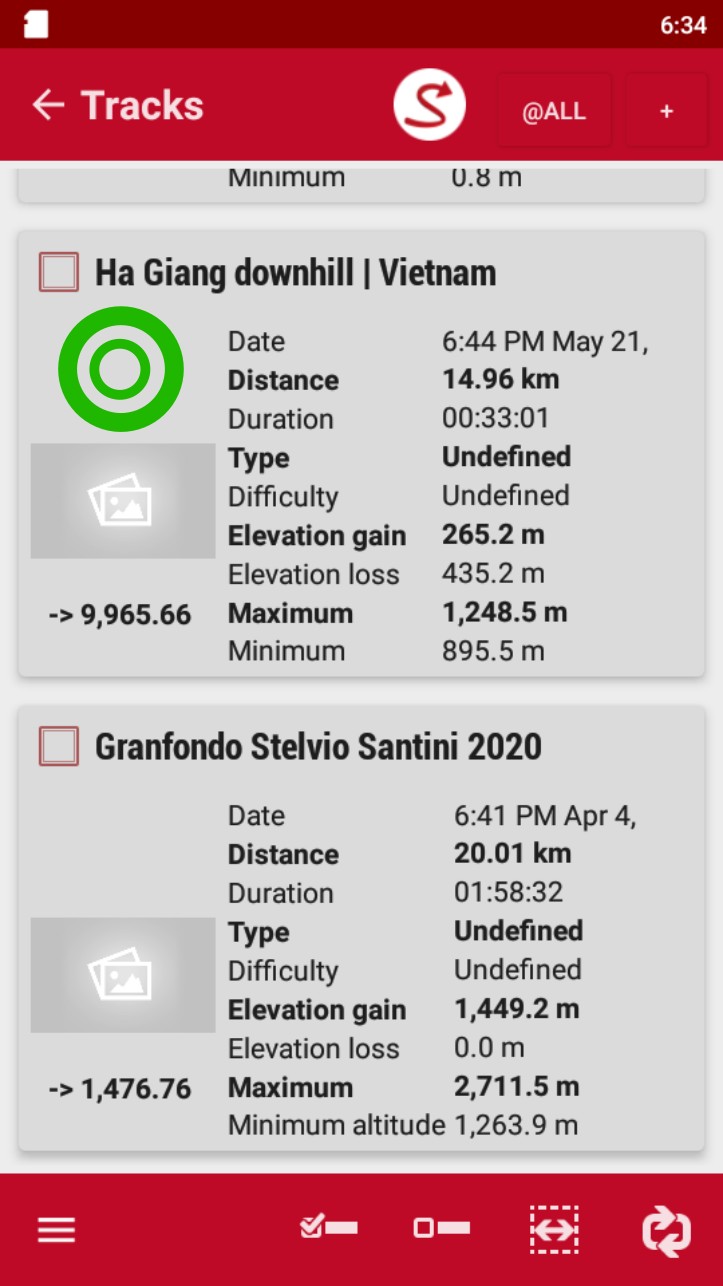
Tap on the desired track/route to open the contextual menu.
Go to “Properties”.
Tap on the configuration panel on the left corner.
Tap on “Upload to”.
Select SICAMI, Strava or the desired app.
Sicami Tracks - Inicio